
Using the teeth map
The teeth map shows patients exactly where each finding is on their smile. You mark the teeth or gums a finding is about, and the video highlights them while it's talked about.
Mapping a finding
Available for both the Generated Video and Personal Video consultation delivery methods.
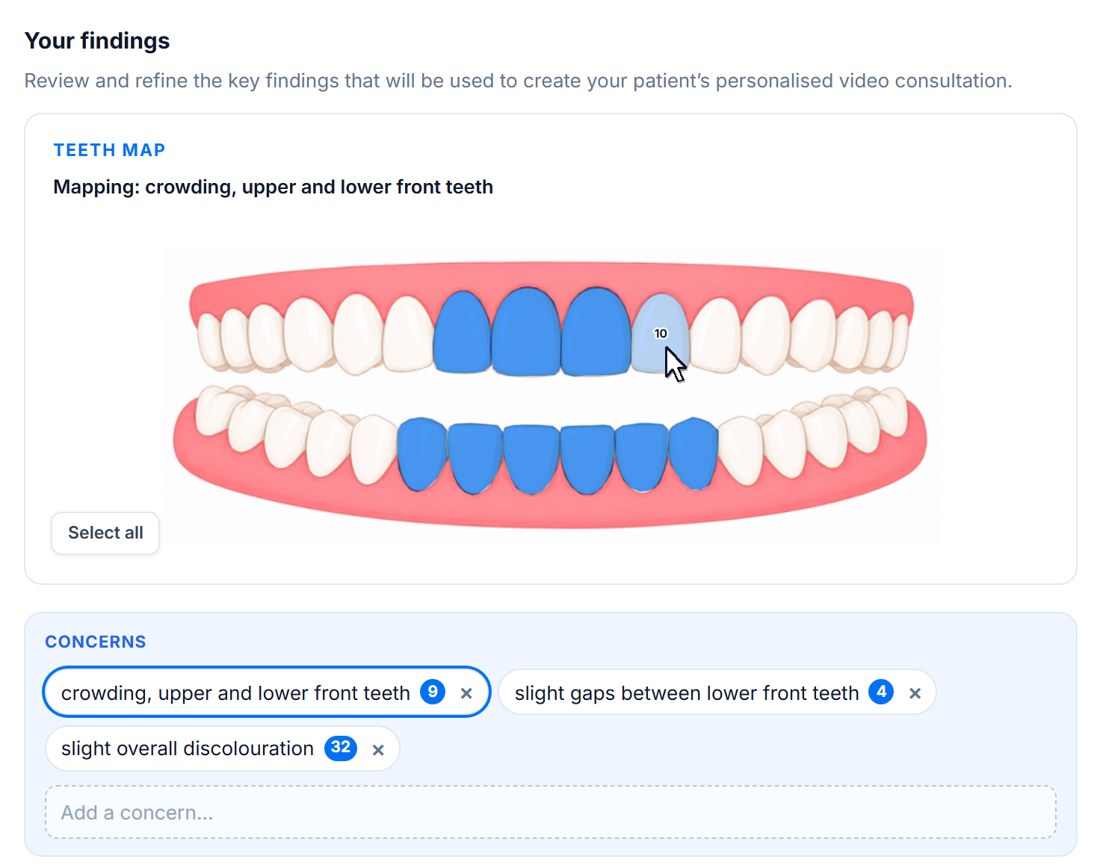
- Click a finding under Concerns or Positives. It's outlined in blue, and Mapping: above the map shows which one you're working on.
- Click teeth to add or remove them. Hover over a tooth to see its number.
- Click the upper or lower gum for anything about the gums.
- Use Select all for something that affects every tooth, like discolouration. Press it again to clear them all.
The number on each finding shows how many teeth and gum areas it has mapped.
Editing your findings
The AI drafts your findings from the patient's photos, but you can change any of them.
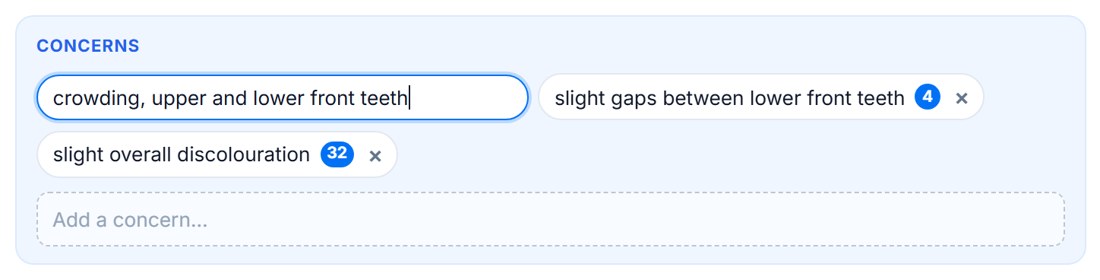
- Edit the wording: double-click a finding, type your changes and press Enter.
- Reorder: drag a finding to a new spot. They're spoken in the order shown for the Generated Video delivery method.
- Delete: press the × on a finding.
- Add your own: type in Add a concern… or Add a positive… and press Enter. Then map it like any other.
You can have up to 4 concerns and 2 positives.
How it appears in the video
- Generated Video: as each concern and positive is spoken, its title and highlighted teeth appear beside the patient's photo. A finding with nothing mapped is still spoken, but isn't shown on the map.
- Personal Video: only concerns can be mapped. While you record, each mapped concern has a button under the camera. Click it and its teeth map appears in the top corner of your video, then click it again to hide it.
See Generated video vs personal video for more on each.
Still stuck?
Contact supportMessage us from your dashboard and we’ll get back to you as soon as possible.