
Adding and managing locations
Each location is one clinic, with its own patients, team, services and prices. Add and manage them in Locations, in Group View.
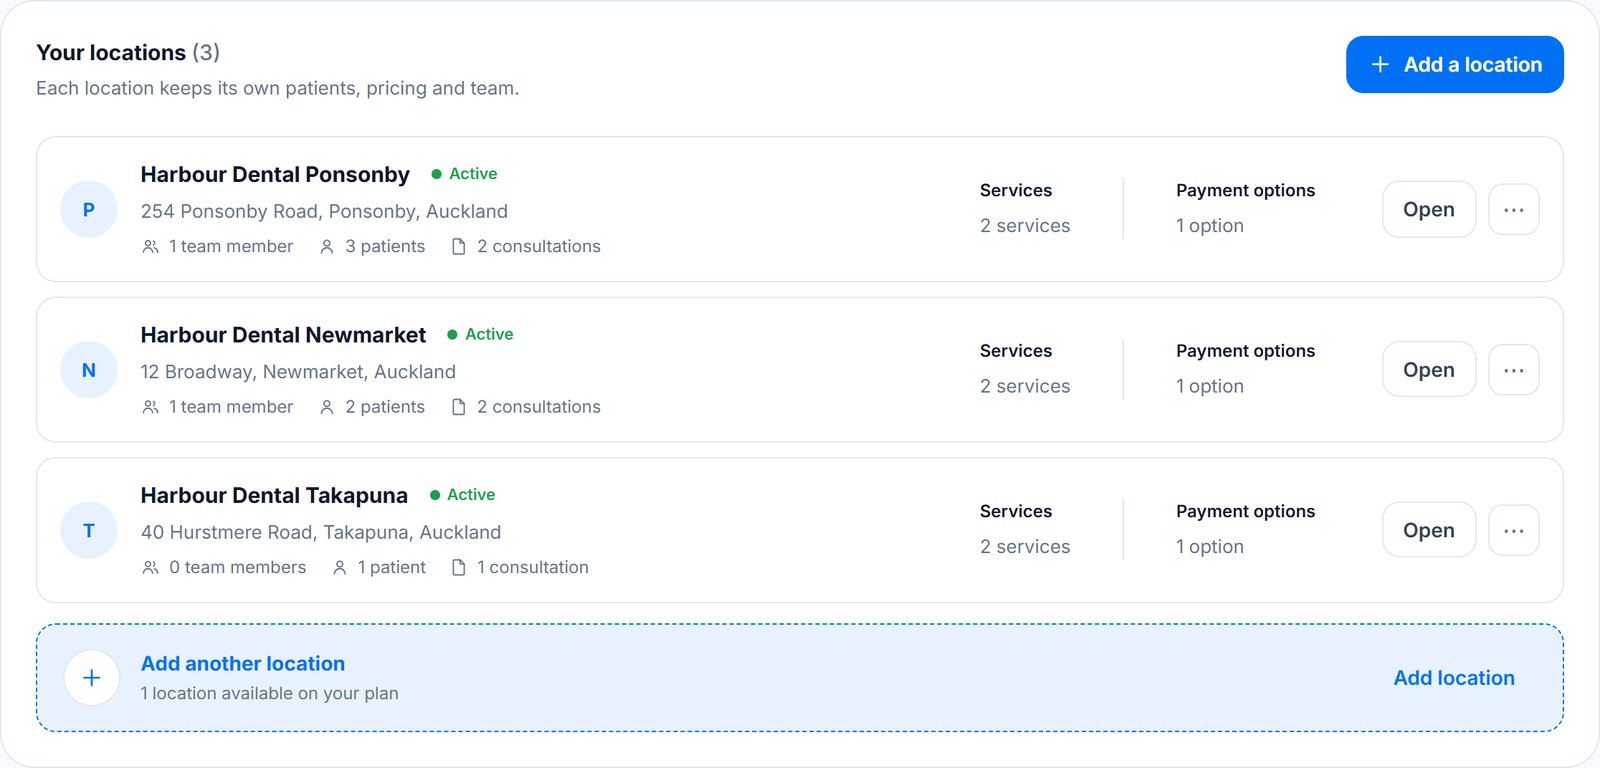
Add a location
- Go to Locations and press Add a location.
- Enter the Name, Street address, Suburb and City.
- Check Patients will see. It's how this clinic is listed when a patient chooses their location on your group's form. It starts as the address, but it's only a label, so you can change it to anything patients will recognise, like "Ponsonby clinic". The address itself stays as entered.
- Choose how to set it up: Start from scratch to add its services and prices yourself, or Copy setup from an existing location to start with another location's services and payment options, which you can change afterwards.
- Optional: add a Sign-in email and password for the location's staff (see below).
- Press Add location.
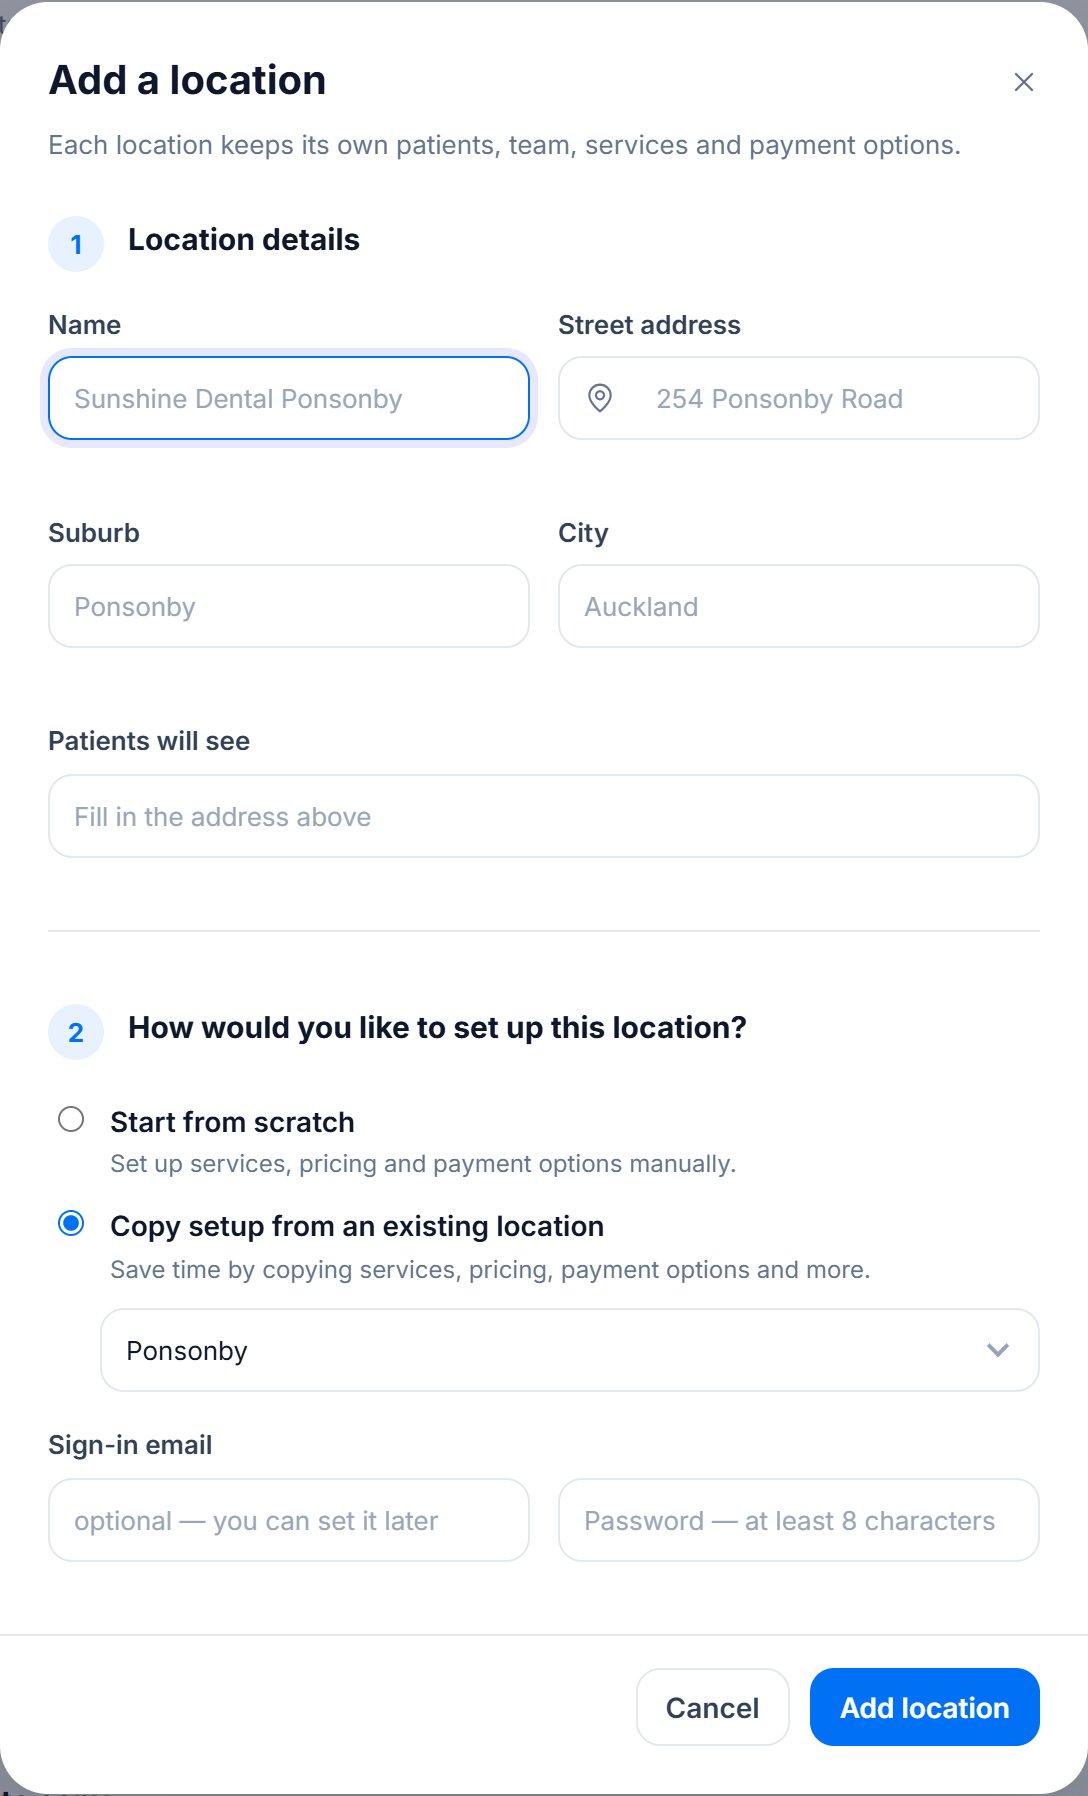
The new location uses the group's branding. Its timezone is taken from your other locations, so if it's somewhere else, change it in its Practice Settings before it sends anything.
Your plan's locations
The meter at the top of the page shows how many locations your plan includes. When they're all in use, press Upgrade plan to add more.
The location's login
Each location can have one login, shared by its staff. It opens that location only.
- Set it up: enter a sign-in email and a password of at least 8 characters, when you add the location or later from Edit.
- Change it: on the location's row, press ⋯, then Edit, and enter the new email or password. Anyone using the old password is signed out on every device.
As the group admin, you don't need a location's login. Open any location from the switcher.
Edit a location
Press ⋯, then Edit, to change its name, address, what patients see, or its login.
Close a location
Press ⋯, then Deactivate, and confirm.
- It leaves the location list on your group's form, and its own form stops working.
- Its patients and history are kept.
- Its login stops working.
- It no longer counts towards your plan.
To open it again, press ⋯, then Activate. Its login works again.
Message us from your dashboard and we’ll get back to you as soon as possible.