
Setting up services
Services are the treatments you recommend. Each one carries its plans, prices and the explainer video your patients see.
Preset services
When you add a service, you start by choosing its type. Pick the preset that matches the treatment you're setting up, or select Custom Service if the service you're providing is not available.
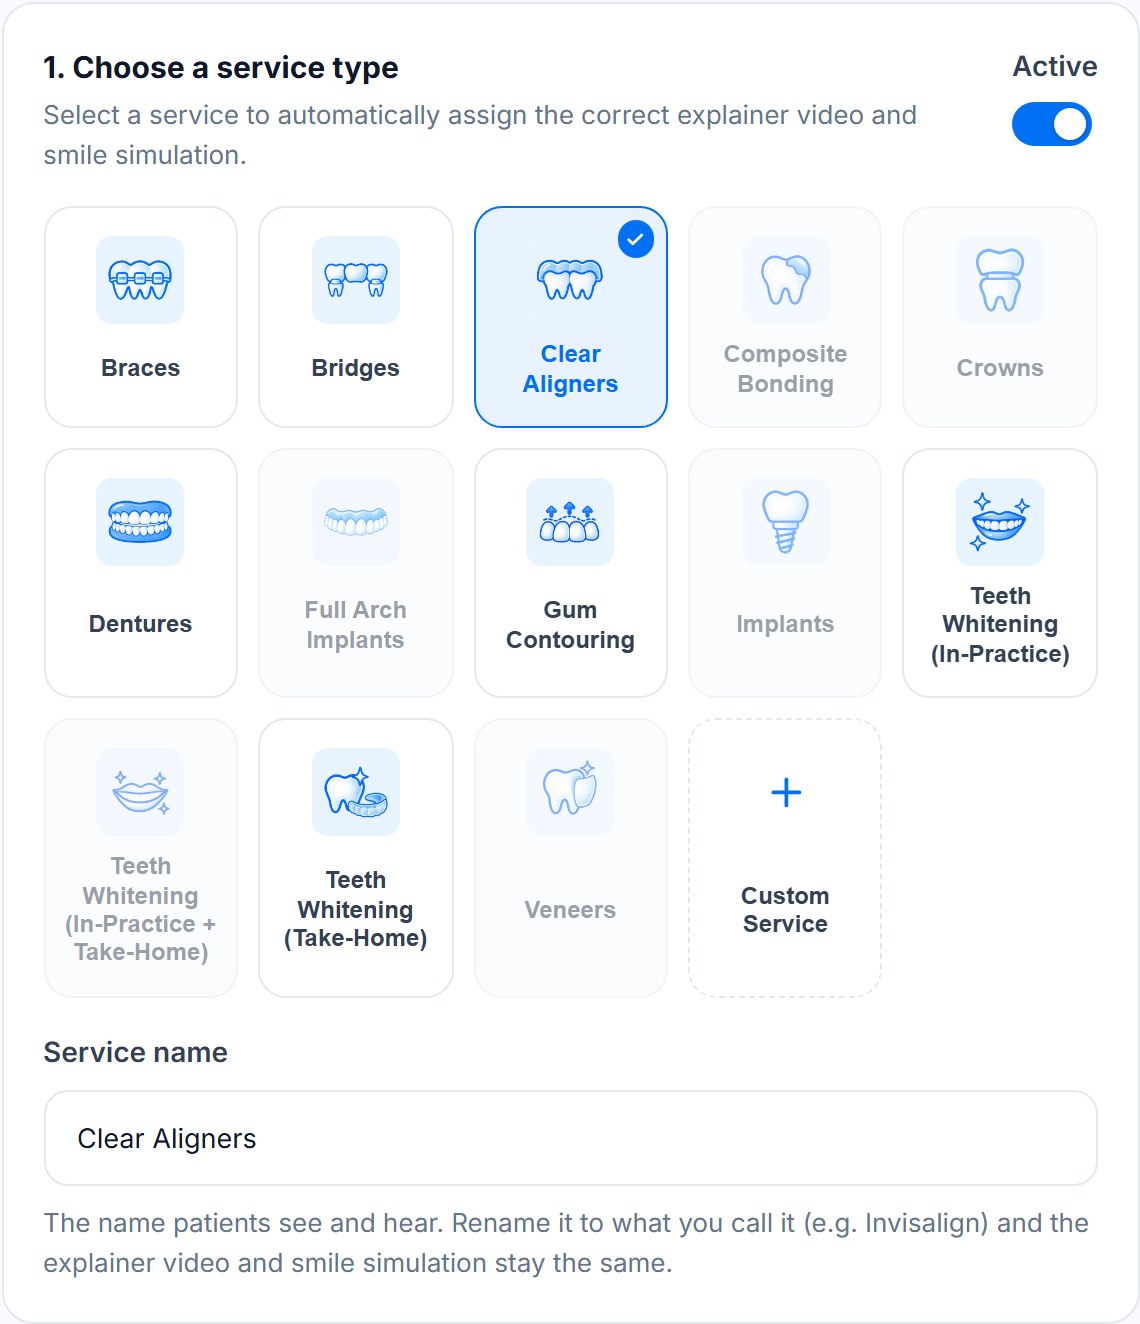
Each preset comes with an optional:
- pre-made explainer video that walks patients through the treatment in their consultation.
- before and after smile simulation, showing the patient a preview of their own smile after treatment. You can choose not to use it for any patient when you grade.
These only work when you choose the matching preset, so pick the closest one to the treatment you offer.
You can rename a preset to what you call it, for example Clear Aligners to Invisalign. The explainer video and smile simulation stay the same.
Custom services
For a treatment we don't have a preset for, choose Custom Service, give it a name and pick an icon.
Custom services work like any other, but they don't come with a built-in explainer video or smile simulation. You can still upload your own explainer video.
1. Add a service
- Go to Services and press Add service.
- Under 1. Choose a service type, pick the matching preset, or Custom Service.
- Change the Service name if you call it something else.
2. Add a short description
Write one line, up to 60 characters, that sums up the treatment. It's shown in the patient portal under Recommended Treatment, so patients see it whenever you recommend this service.
3. Explainer video
The explainer video walks patients through the treatment to help them gain a basic understanding of how it works.
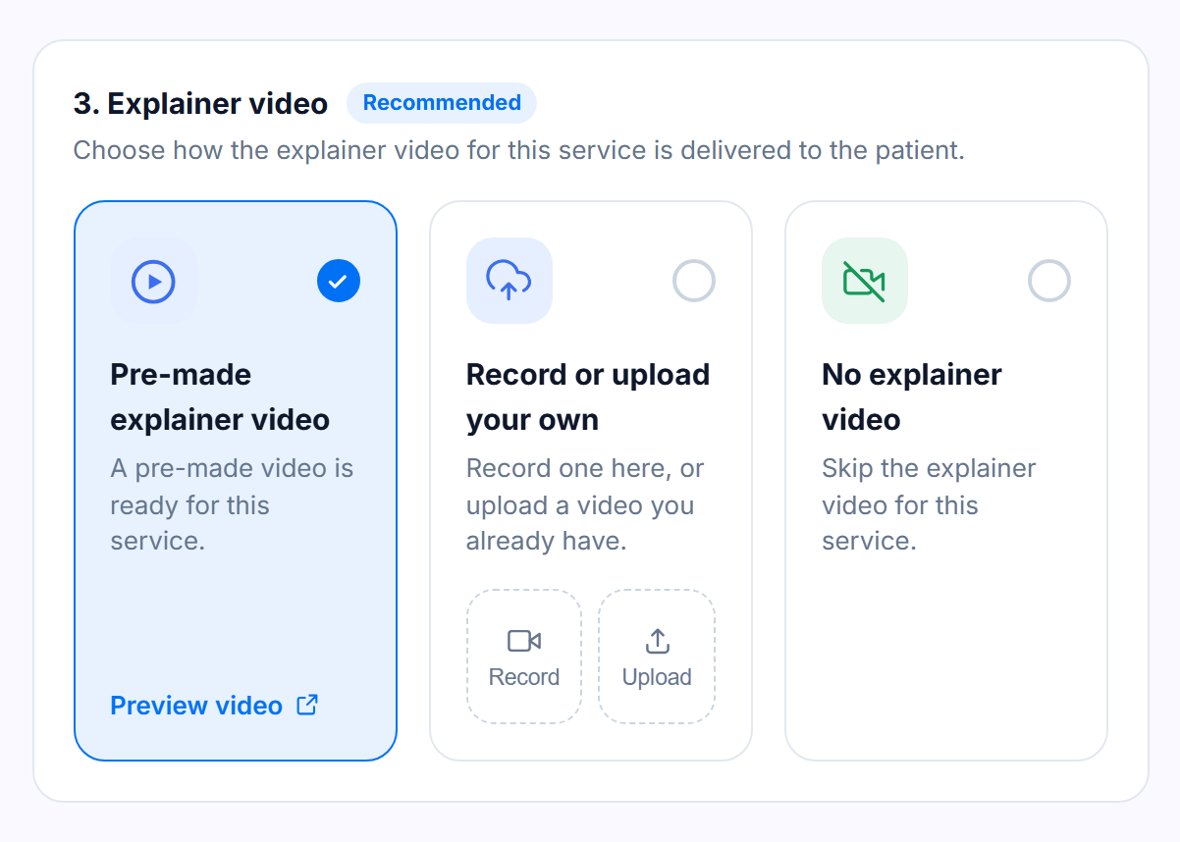
Choose one of three options:
- Pre-made explainer video: use our generic video for this treatment. It's only available on preset services. Press Preview video to watch it.
- Record or upload your own: press Record to film one right here with your webcam, or Upload a video you already have (MP4, MOV or WebM, under 500 MB).
- No explainer video: skip it for this service.
Recording your own
- Press Record, and allow your browser to use your camera and microphone.
- Check the right camera and microphone are selected at the bottom of the video.
- Press the record button and explain the treatment. Aim for 1 to 2 minutes: the timer counts up to 2:00.
- Press it again to stop, then watch it back. Press Re-record to try again, or Use this video to save it.
When patients see it
It depends on how you reply:
- Generated Video: it plays straight after the recommended treatment section. If you recommend more than one treatment, each explainer plays in the order you chose them.
- Personal Video: it's added at the end, after your own recording.
Text message replies don't include explainer videos.
4. Treatment plans
Treatment plans are optional, but they save time. Instead of setting the duration and price each time you grade, you pick a plan. Under 4. Treatment plans, press Add plan for each option you might offer, for example "Upper arch only" and "Both arches".
For each plan:
- Give it a Plan title. This is required.
- Set the Duration: Single visit, A few visits (appointments over weeks or months), or Ongoing (months).
- Set the Pricing: a price range or a single price.
- Tick the Payment options patients can use for it, and choose a Featured payment option to show in the consult video.
- Press Done.
Press Save changes when you've finished.
5. Optional special offer
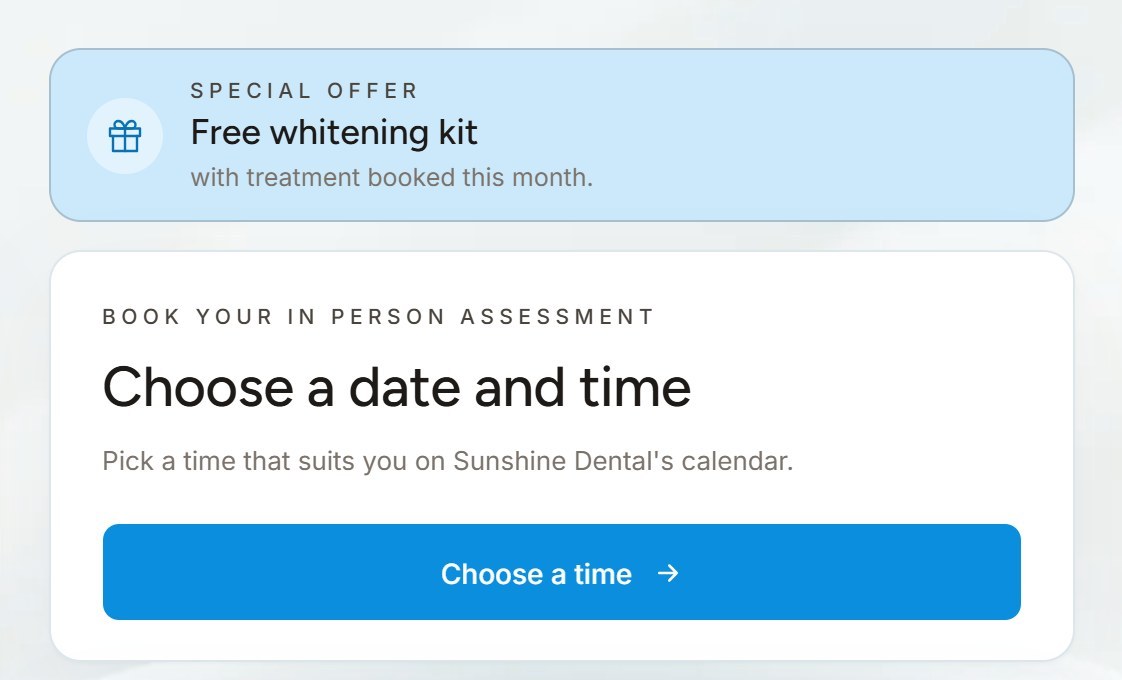
Add an Offer title (up to 40 characters) and an Offer description (up to 100), for example "Free whitening kit" with "with treatment booked this month". Leave both empty for no offer.
The offer then shows in the patient portal every time you select this service when you grade, right above the booking form. You can still change or remove it for one patient.
6. AI chat widget
The AI chat widget is optional. It answers patients' questions in their patient portal, using only the information you give it: the Treatment explanation and FAQs you add here, your practice details and the patient's plan. It never guesses prices or timeframes.
Add a clear explanation and your common FAQs so it answers the way you would. To remove the chat from the patient portal, turn off the switch at the top right of the section.
Turning a service on and off
Use the Active switch. Inactive services stay saved but don't appear when you grade. Drag services to change their order.
Message us from your dashboard and we’ll get back to you as soon as possible.