
Adding the smile assessment form to your website
The smile assessment form is how patients send you their photos. You add it to your website with one short piece of code.
Get your code
- Go to Practice Settings.
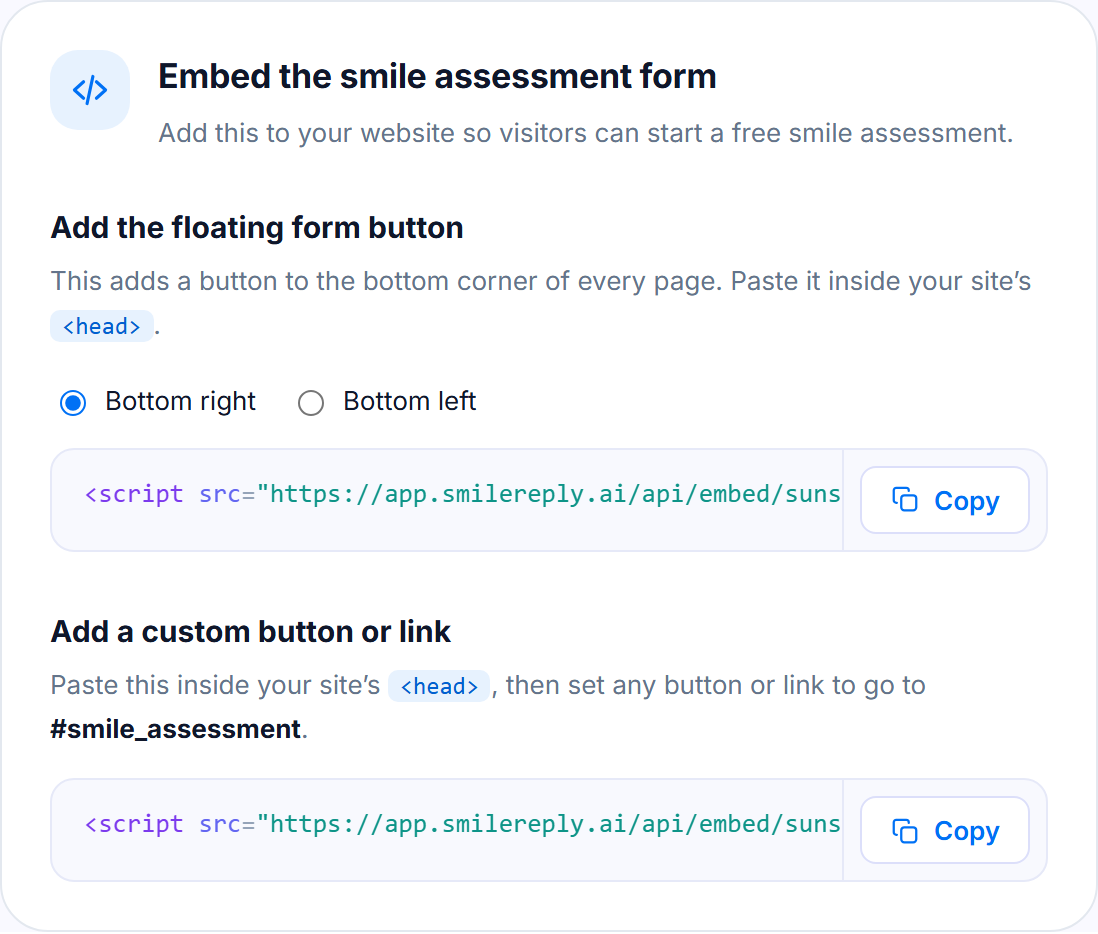
- Find Embed the smile assessment form.
- Copy the code from the step you want (below).
Option 1: a floating button
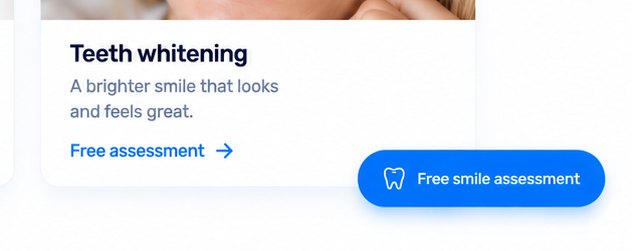
Step 1 in the card adds a Free smile assessment button to the bottom corner of every page.
- Choose Bottom right or Bottom left.
- Press Copy.
- Paste the code inside your website's
<head>.
Option 2: your own button or link
Step 2 in the card lets you use any button or link on your site instead of the floating one.

- Press Copy and paste the code inside your website's
<head>. - Set any button or link to go to
#smile_assessment.
Most website builders (Wix, Squarespace, WordPress) let you type #smile_assessment straight into a button's link field.
What patients see
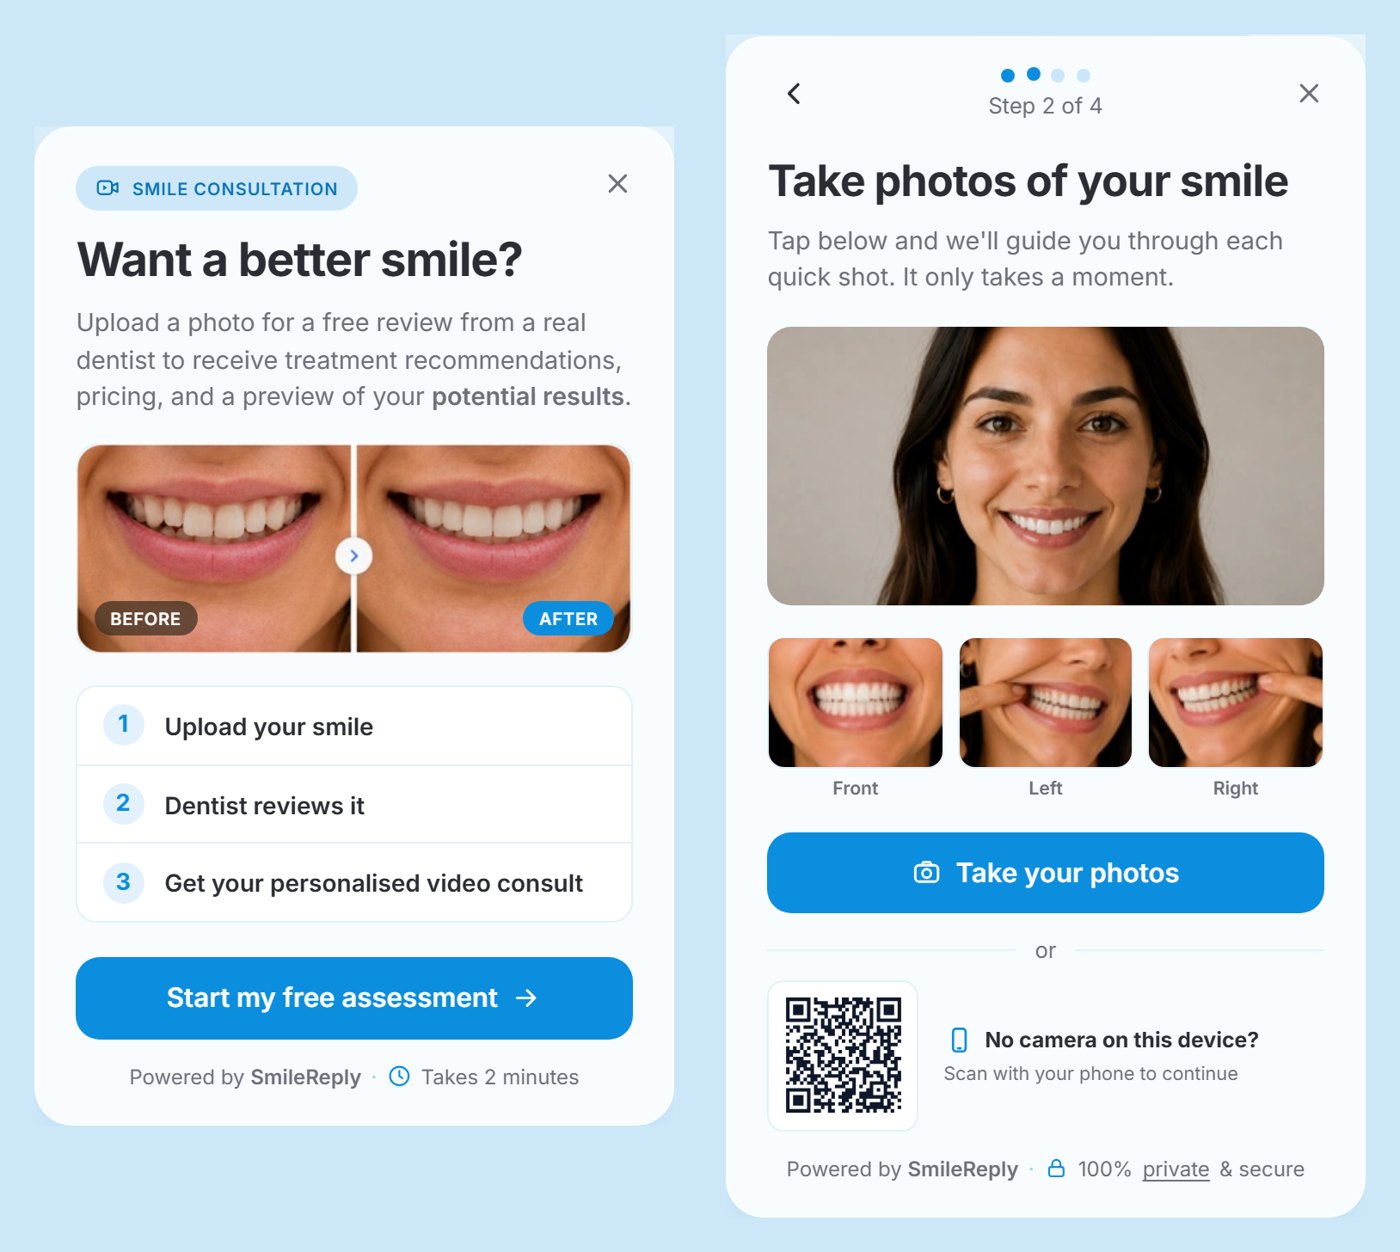
The form opens over the top of your website, so patients never leave it. They:
- Say who the assessment is for.
- Take or upload five photos: front, left, right, upper and lower.
- Add their name, email, mobile and what they'd like to improve.
- Agree to be contacted and to the privacy notice.
You're notified as soon as they submit, and the assessment appears in Submissions.
Branding your form
The form uses your Primary colour from Practice Settings, under Branding. It colours the buttons and highlights, and tints the background. The floating button uses it too.
To change it, set a new Primary colour and press Save changes. Your form and button update automatically, usually within a minute. You don't need to copy the code again.
- Font: the form always uses the same clean font, whatever Headline style you choose. Headline style changes your patient portal, consult player and consult video.
- Logo and Button colour: these aren't used on the form. They appear in the patient portal.
Message us from your dashboard and we’ll get back to you as soon as possible.